Caterpillar CAT Catalog Electronic Technician Manual
What’s New – Caterpillar ET 2017A?
Communications Adapter 3 (CA3) Update
The service tool contains a new version of the Communications Adapter 3 (CA3) software. The new software allows flashing at 500 kilobits on supported applications.
Marine Sea Trial Changes
In the marine Sea Trial Steady State feature, the 9xx manual entry parameters have been updated. Some numbers have been removed, and some existing numbers have new descriptions. New figures have been added with new 900 number designations for current engines, including Tier 4 SCR based after treatment engines. The steady-state setup files names and content have changed, and are based on the engine cooling system. The Sea Trial Feature is now supported on marine fixed speed engines.
Caterpillar Electronic Technician manual:
Part 1: How to install
Perform the following steps to install the service tool from the Install
CD-ROM:
Step 1 Close any applications you are running. This includes
any connections to mainframe computers or networks.
Only Windows should be running.
Note: If you are running Windows NT, Windows 2000, or Windows
XP, you must have administrative rights on your computer system to
install the service tool.
Step 2 Insert Caterpillar Electronic Technician Install CD-ROM
into your computer’s CD-ROM drive.
Step 3 Press the “Start” pushbutton on the Task Bar. From the
menu, select “Run.” The Run dialog box is displayed
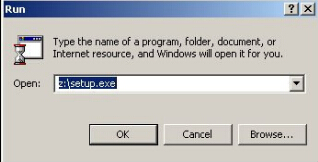
Step 4 In the text box type the following:
z:\setup.exe
If the CD is in a CD-ROM drive other than “z,” substitute
“z” with the appropriate drive letter.
Step 5 Press “OK.” The “Setup is preparing…” status box is
Displayed
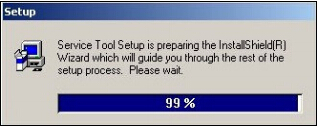
This status box shows the percentage status of the InstallShield Wizard setup. When it is finished, the Welcome dialog box is displayed
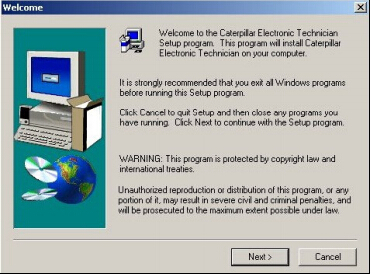
Step 6 Read through the welcome message. Press the “Next>” pushbutton to continue the setup. The Software License Agreement dialog box is displayed. Press “Cancel” to abort the setup process.
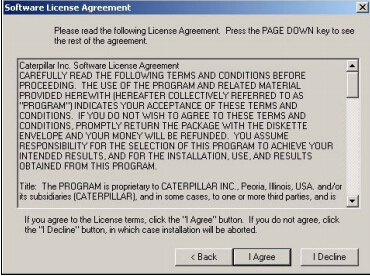
Step 7 Read through the license agreement. Press the “I Agree” pushbutton to accept the terms and conditions. The Select Components dialog box is displayed
Press “
Internet Explorer information:
You must have at least Internet Explorer version 5.5 installed on your PC to run the service tool. If you do not have Internet Explorer on your PC, you must install it. If you have an older version of Internet Explorer on your PC, it may not support the service tool, and you need to update your current version of Internet Explorer. Press “Yes” in the Install Internet Explorer dialog box to begin the installation.
Note: A message box may display asking you to reboot. Rebooting is required before continuing installation.
Upgrade information: If you are upgrading from a previous version of the service tool, and if your current service tool is licensed, the License dialog box is displayed showing the current license number. Write down the license number and keep it in a safe place. Press “OK.” The Select Components to Install dialog box is displayed.
Service Tool Serial Number___________________________
NOTICE: To keep your existing license, always install the service tool in the same folder as the previous installation.
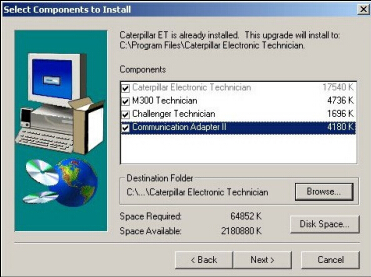
Step 8 Select the check box corresponding to the components(s) you wish to install.
Browse
To select a path different from the one shown in the Destination Folder area, press the “Browse…” pushbutton. The Choose Folder dialog box will display. In this dialog box, you can change the directory path by selecting the drive and folder that you want to install to by typing the complete path in the Path text box.
Disk Space
To check available hard disk drive space for all available drives, press the “Disk Space…” pushbutton. The Available Disk Space dialog box will display.
Changing the drives in the Available Disk Space dialog box changes the drive your destination folder is pointing to in the Select Components to Install dialog box. Press the “Next>” pushbutton to continue the setup. The Select Languages dialog box is displayed
Press “
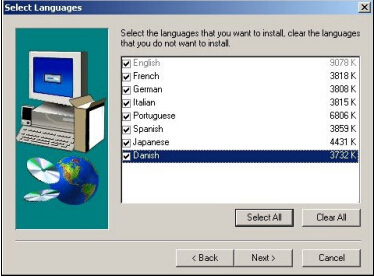
Step 9 Select the check box next to the language(s) you wish to install. Press the “Next>” pushbutton to continue the setup. If more than one language is selected, the Select Default Language dialog box is displayed
Press “
Select All
To select all language check boxes, press the “Select All” pushbutton.
Clear All
Pressing the “Clear All” pushbutton clears all checked languages except English, which is always checked.
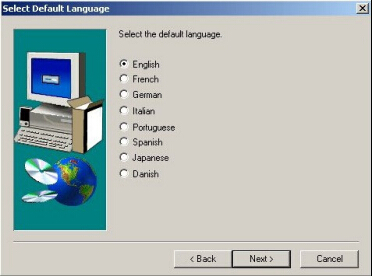
Step 10 Select the radio button corresponding to the default language you want. You can change the language later in the service tool.
Press the “Next>” pushbutton to continue the setup. The Select Program Folder dialog box is displayed.
Press “
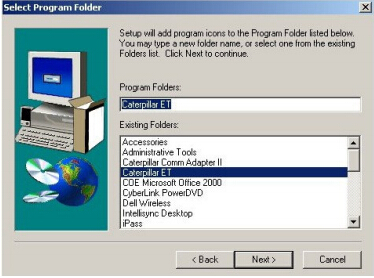
Step 11 Caterpillar ET is the default Program Folder name. If you want to change the Program Folder name, select a folder from the Existing Folders text box, or type a folder name in the Program Folders text box.
Press the “Next>” pushbutton to begin copying files. The Setup screen is displayed. Press “
Note: A dialog box displays the question, “Would you like this installation to put the service tool icon on your desktop?” Press “Yes” to place the icon on your desktop, or press “No” if you do not want the icon placed on your desktop. Once the service tool icon is placed on your desktop, this dialog will not display.
Step 12 The setup process begins copying files. Press “Cancel” to abort the setup/install procedure.
When the installation process is successfully completed, the Setup Complete dialog box is displayed. The Setup Complete dialog box varies depending upon whether or not the computer must be restarted to complete the installation or if you need to license your service tool.
Communication Adapter II information:
When installing the Communication Adapter II, a message box is displayed with important instructions about the Communication Adapter II. Press “OK.
Warning for service tool user:
If you are installing the service tool on Windows 2000 or XP, a warning box displays suggesting that anyone running Caterpillar Electronic Technician be a member of the “Power User” group. Press “OK.”

Step 13 If the Setup Complete message box displays the following message: “Some files were locked – Must Reboot to Finish Setup”
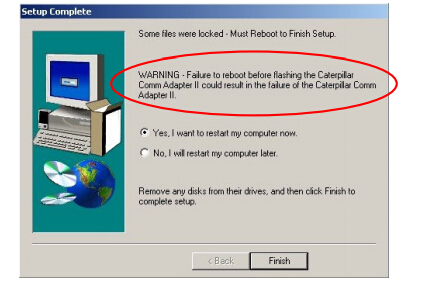
then you must restart your computer to complete the setup.
Note: If you do not install the Comm Adapter II software, the WARNING message does not display in this dialog box.
Select the “Yes, I want to restart…” radio button to restart your computer now, or select the “No…” radio button to restart your computer later. Press the “Finish” pushbutton to complete the setup. The “
Note: If you elect not to reboot at this time, the service tool will not operate correctly
OR–
If upgrading from a licensed version, the Setup Complete dialog box is displayed with the following message: “Setup can launch the Read Me file and Caterpillar Electronic Technician.”
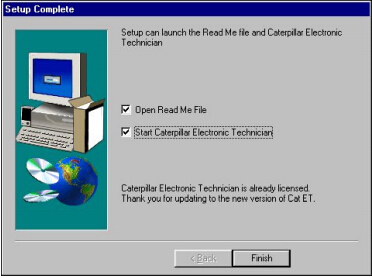
Select the appropriate check box depending on whether you want to launch Read Me or start the service tool. Press the “Finish” pushbutton to complete the setup. The “
OR–
If the service tool is not already licensed, the Setup Complete dialog box is displayed with the message: “Setup can launch the Read Me file and License Caterpillar Electronic Technician”
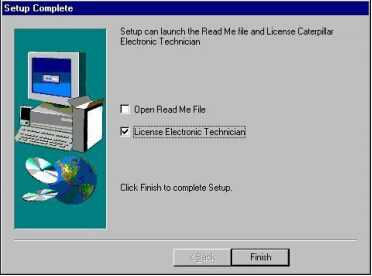
Select the appropriate check box depending on whether you want to launch Read Me or License Caterpillar Electronic Technician. Press the “Finish” pushbutton to complete the setup. The “
Part 2: How to Configure Electronic Technician to use the Communication Adapter II
In order for Electronic Technician to work with the Communication Adapter II, you must change the Settings to select the Communication Adapter II as your Communication Interface Device:
Step 1 Start Caterpillar Electronic Technician
Step 2 Press the “Stop Connect” button when it appears
Step 3 Select the “Settings” menu (or the “Utilities” menu with
ET 2001A or later)
Step 4 Choose “Preferences…”
Step 5 Select the “Communications” tab
Step 6 Change the Communication Interface Device to SIP
Step 7 “COM1” should be selected. This application firmware
only supports Serial communications.
Part 3: Ready to use CAT Electronic Technician 2017A V1.0
View active and logged diagnostics.
View events where irregularities occurred and were logged by the ECM.
View the status of a group of parameters (temperatures, pressures, etc.) simultaneously.
Record and log performance data.
Graph a group of status parameters.
View the current configuration of an ECM.
Change ECM configurations.
Perform diagnostic tests.
Perform calibrations.
Print reports and diagnostic results.
In details…