Tips to replace TP Screen on Autel MaxiSys MS906 MS906BT Tablets
Here’s the important notes on replacement of new supplier’s TP Screen on Autel MaxiSys Tablets.
A. Part Number of new TP screen Involved
501003930 MS906
501003932 MS906BT
501004169 MS908
501003923 MS908S
Note: The above new TP screen is provided by a new supplier, which will be used for TP replacement of the above models.
TOOLS REQUIRED:
• Iron Solider
• Allen Key 2.5mm
• Allen Key 3.0mm
• Front Shell Kit (TP + LCD Screen)
BEFORE PERFORM TP SCREEN REPLACEMENT KINDLY UPDATE LASTEST OPERATING SYSTEM FOR THE DEVICE
Maxisys 906 V03.46.00
Maxisys 906BT V03.31.00
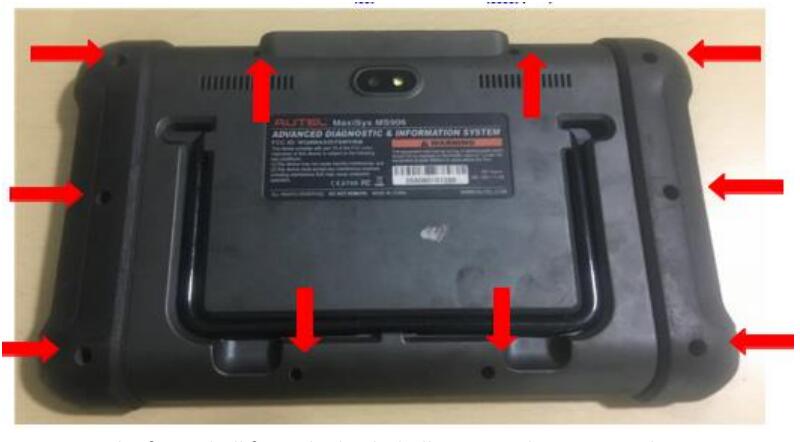
1. First step uses the Allen Keys (2,5mm and 3mm) to remove the ten (10) bolts at the back shell of the tool
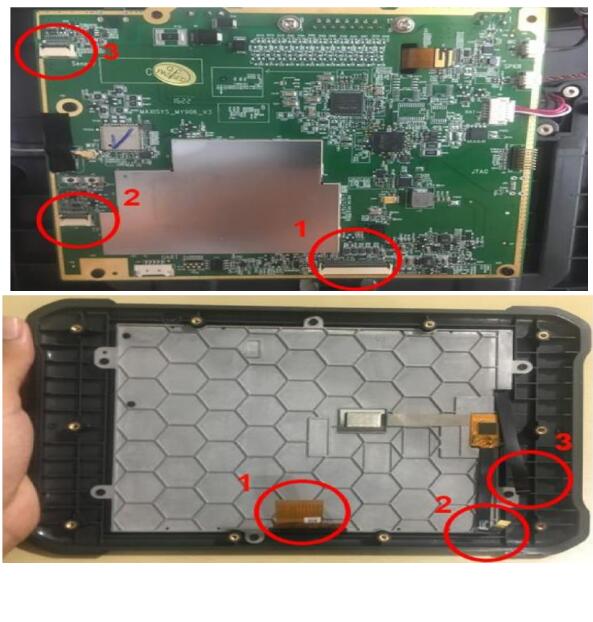
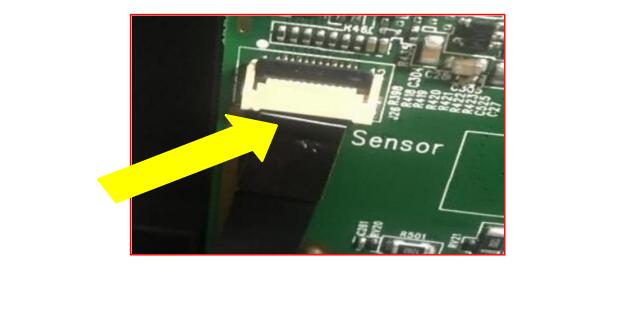
2. To remove the front shell from the back shell, you need to remove the connections between the Main Board and Light Sensor, Touch Panel and LCD Screen, on that order. To remove the connections, you should release the secure-clip before remove it.
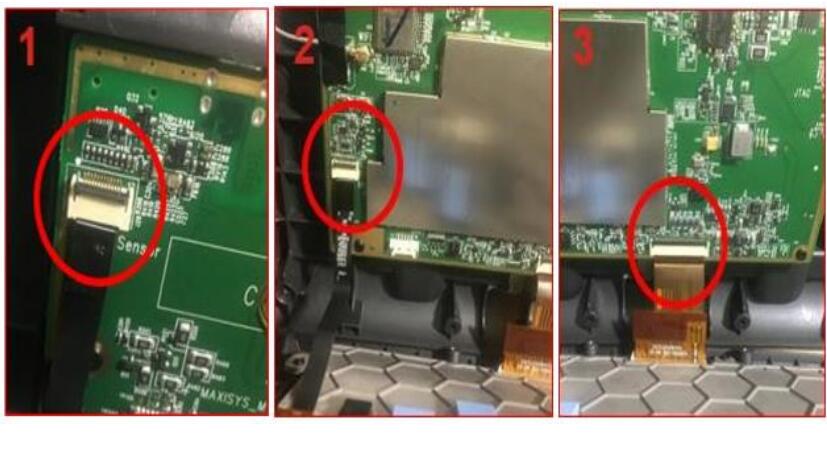
3. Now we should make the connections between the Main Board and the new front shell, which include the new Touch Panel and LCD Screen. Remember to close the secure-clip on each connection between the Main Board and Light Sensor, Touch Panel and LCD Screen.
Note: Please make sure the white line is as close as it can to the connection, if yes, please close the secure clip.
Note: After you install properly the new front shell turn on the MaxiSys MS906 MS906BT and test it, if the Touch Panel is not working, remove the front shell and please follow the next steps below.
4. Locate the R375 Chip at the upper left side of the Main board.
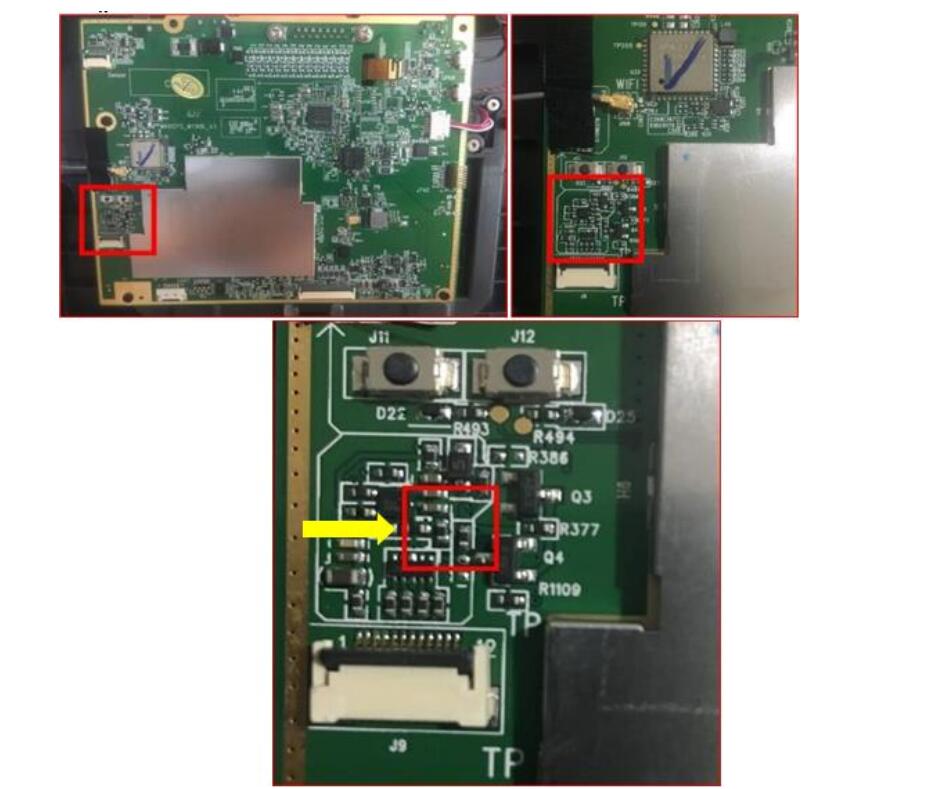
5. Using an iron soldier, remove carefully the Chip heating it at one of it sides.

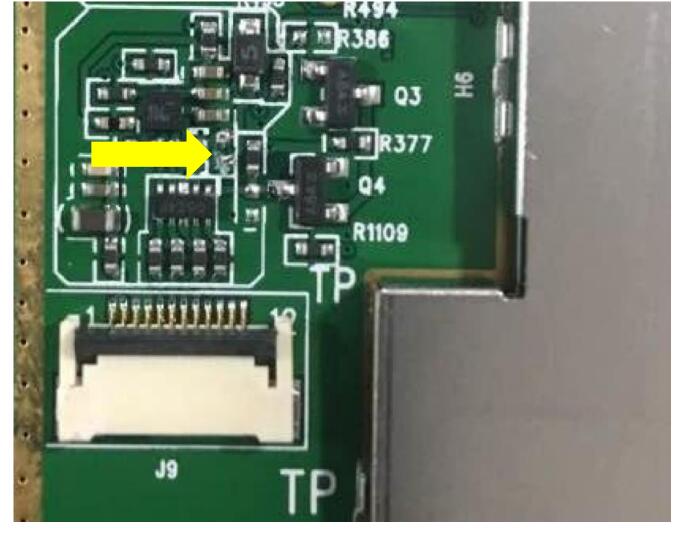
6. Remove R375 Chip for MS906,MS906BT,MS906TS
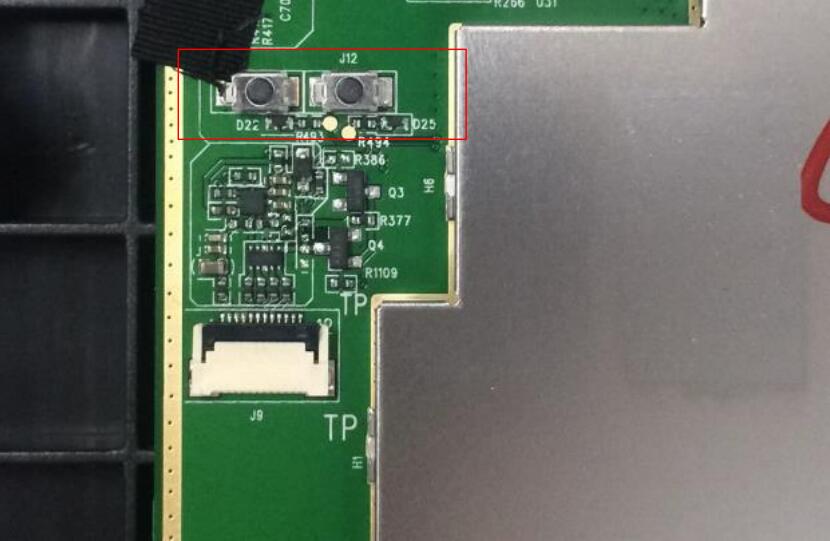
7. Remove J11, J12 buttons (as showed below) for MS06BT, MS906TS
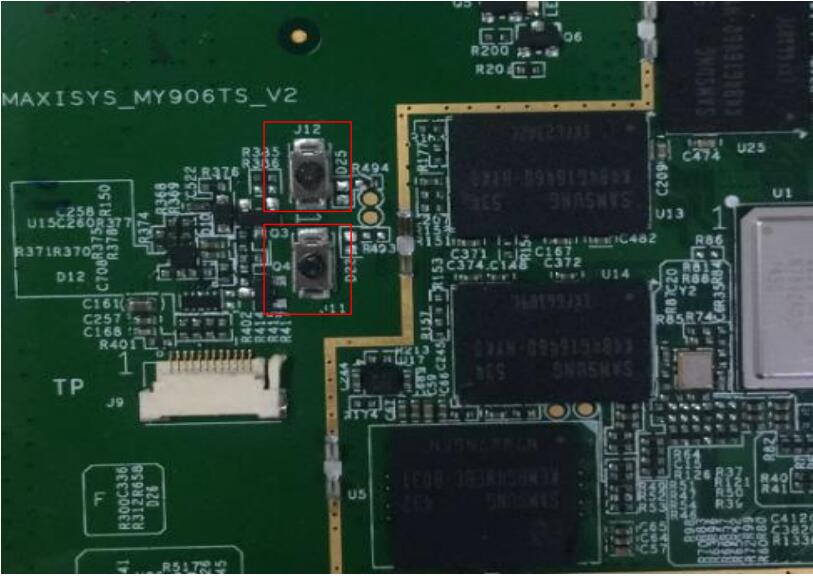
8. Remove J11, J12 buttons (as showed below) for MS906
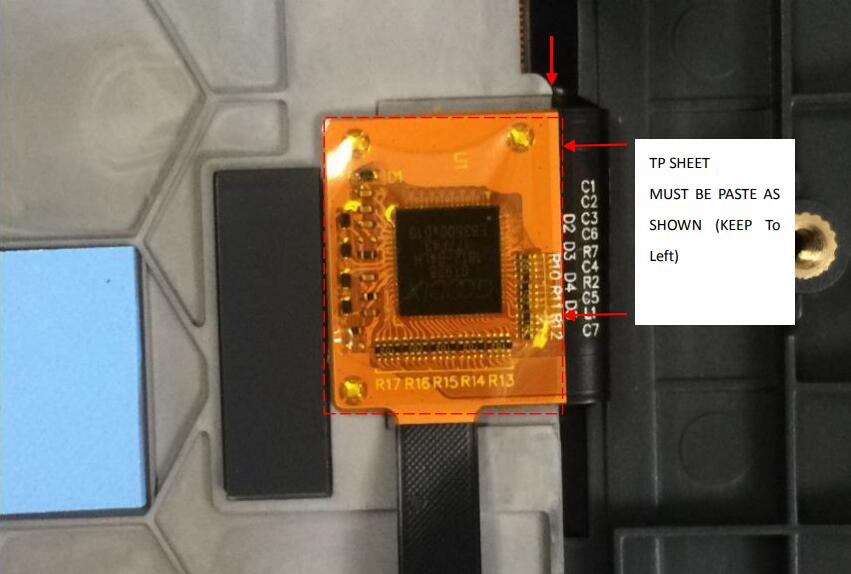
9. Pasting way of TP for MS906, MS906BT, MS906TS
10. Now, make the connections between the Main Board and the new front shell, which include the new Touch Panel and LCD Screen. Remember to close the secure-clip on each connection between the Main Board and Light Sensor, Touch Panel and LCD Screen.