How to Update AUTOPHIX 7710 Ford Scanner Software
How to Update Autophix 7710 Ford Scanner software?
Operating system: Windows 7/8/9
First you need to download software online
Free download Autophix 7710 V1.1.8 software EN
Open Update software folder
Read README.txt file before upgrade
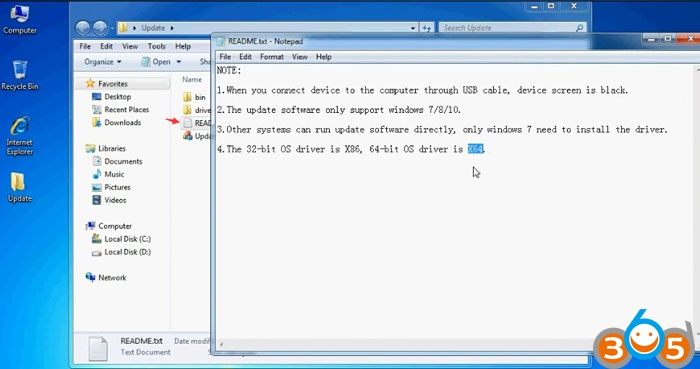
1. When you connect device to the computer via USB cable, device screen turns black.
2. The update software can be installed on Windows 7/8/10 only.
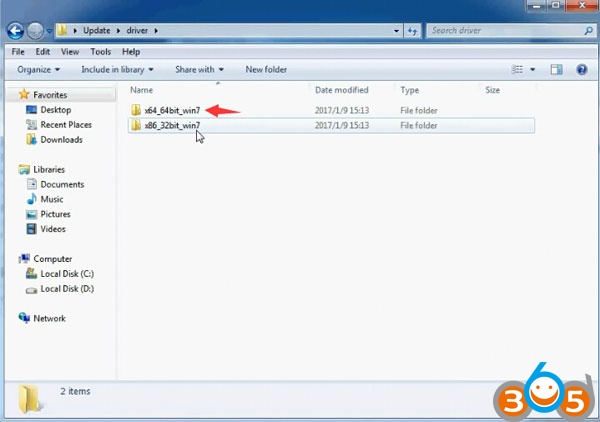
3. Other system can run update software directly, only Windows 7 need to install software driver
4. The 32-bit O/S uses X86 driver, 64-bit O/S uses X64 driver.
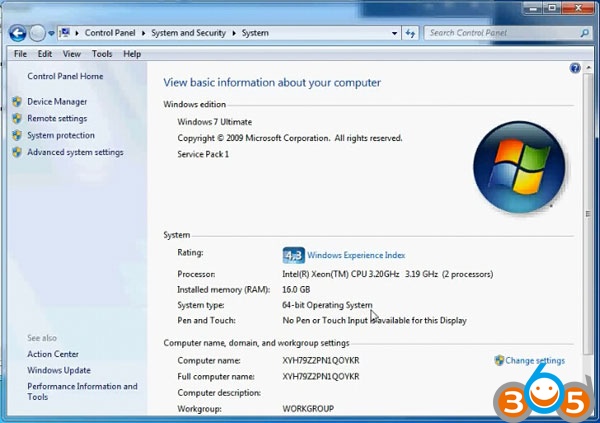
Here’s installation demo on Windows 7 64-bit system
(How to check operating system: Start->Control Panel->System and Security->System)
Now connect Autophix 7710 code reader with computer via USB cable
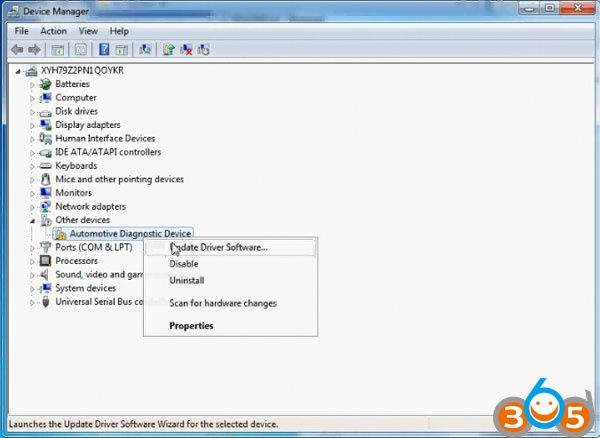
Open Device Manager->Other devices->Right click Automotive Diagnostic Device, select Update Driver Software

Select Browse my computer for driver software
Here we need to choose driver for 64-bit system
Browser to C:/Users/Administrator/Desktop/Update/driver/x64_64bit_win7

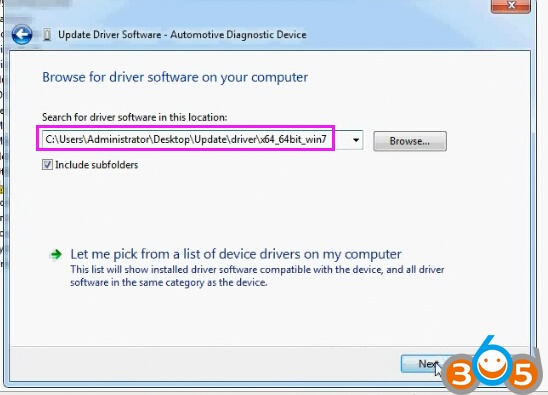
Click on Next
If system prompts error “Windows can’t verify the publisher of this driver software”, select Install this driver software anyway.
Installing driver software…
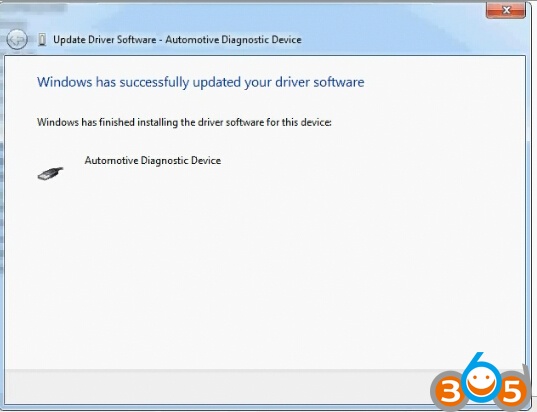
Windows has successfully updated your driver software
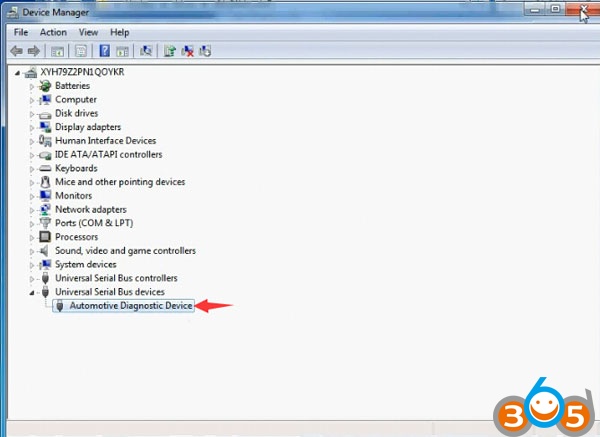
Open Device Manager to check the Automotive Diagnostic Device is well installed.
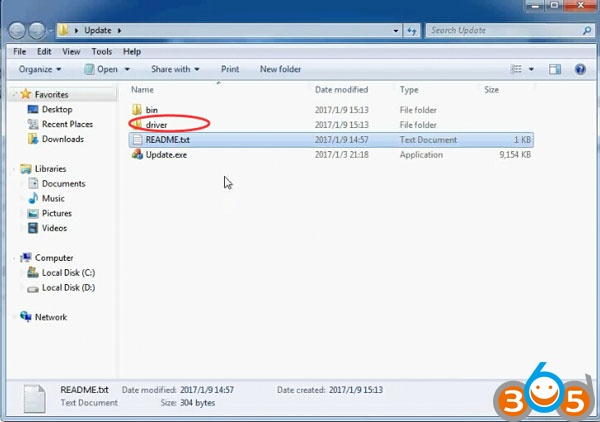
Back to Update folder

Open Update.exe
Click Update to update software until finished
Do not disconnect AUTOPHIX 7710 scan tool during the update procedure.