DRB3 Emulator wiTech VCI Pod clone Reviews
Received wiTech VCI Pod and the clone this week, and tested this Saturday. Now, I’d like to share something about it with you all.
1. Order and shipping
I purchased the wiTech VCI Pod clone from China, the site: https://www.obdii365.com/wholesale/chrysler-diagnostic-tool.html it’s around $419, shipped via DHL
2. The wiTech VCI Pod kit
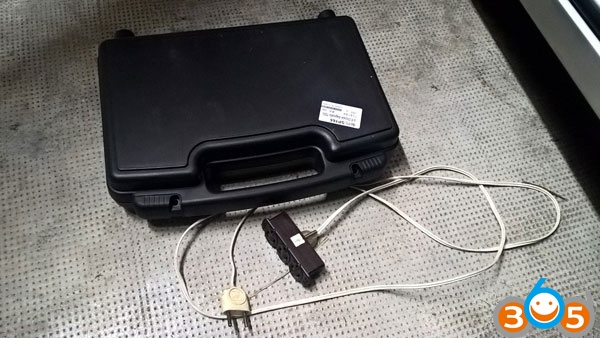
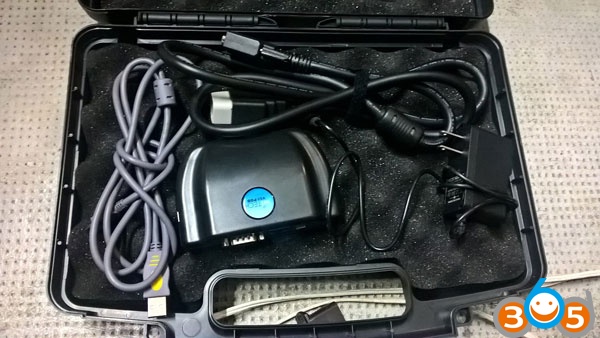
The VCI Pod comes in a small plastic suitcase, shipped as-is without any other protection whatsoever. But it’s not a big deal because hopefully there’s foam inside the case to protect everything inside. The case contains:
- 20m USB cable, the cable is thick and quality looks good. The plastic bag says it’s a USB 2.0 cable, ok fair enough.
- OBD-II to DB-15 (VGA connector) cable, something like 1m-1.20m long. It looks very stiff! The cable is thick, both plugs are molded… I hope they will last as long as they look good.
- Power cord, 220v@50hz/110v@60hz AC to 12v DC, I don’t remember the amperage tho. It’s a US plug so in EU a converter must be used.
- The VCI Pod itself
- A non-labelled CD-R (maybe it was a CD-RW!) with the WiTech v13.03.58 software and all the prerequisites (Adobe AIR v4, Acrobat Reader XI).
- A sticker
As I used to live in San Francisco, I made myself a “power cord” with an old EU cord and a ACE Hardware power strip as you can see in this picture. Ok it looks awfully dangerous but it’s not
Inside the box… The sticker is glued to the Pod now, and the CD is missing in this photo.
3. Connectionto the computer
First install Adobe AIR and Acrobat Reader. During AIR installation, disable the automatic updates! Then start the wiTech install and follow the wizard… Then see a “wiTech Manager” in the task bar near the time/date, start it and disable the automatic updates in the preferences menu.
Also notice a yellow (or red) icon in the task bar, this is the wiTech server. It should turn green after a while (no need to connect the Pod).Connect the wiTech Pod clone to your computer using the provided USB cable, or a regular ethernet cable.
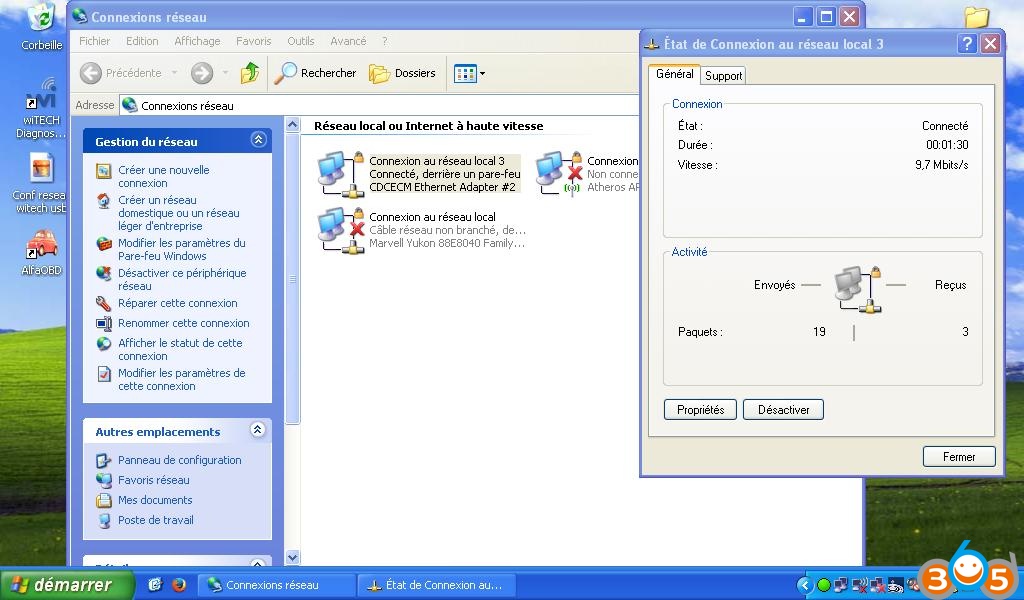
- USB: On the first connection with the computer, the USB port will be recognized as a “virtual” network adapter. I’m using an old Windows XP laptop and no driver was required. The Pod acts as a DHCP server and your computer will be given an IP address, something like 172.22.22.x. The Pod address is 172.22.22.22. You don’t need to know that… It’s useless unless you’re a nerd like me.Good thing about the USB, the Pod will boot on the USB power. Once it’s connected to the car, no need for the power cord for basic use.
- Ethernet: This is a bit trickier… There’s no DHCP server here so you must configure your network card before you can connect to the Pod. Set your computer network adapter’s IP to 192.168.0.whatever except 10, like 192.168.0.1. Netmask must be 255.255.255.0. Gateway and DNS are not mandatory, leave these settings alone. The Pod ethernet IP address is 192.168.0.10. I prefer ethernet to USB but in this mode the Pod must be powered by the power cord.
To summarize:
USB = no configuration on the PC, no power cord required on the Pod.
Ethernet = basic network configuration required on PC, power cord required. Ethernet plugs are supposed to be stiffer than USB tho…
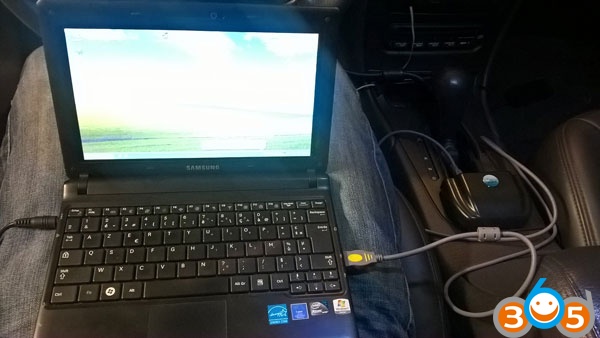
And here it is! wiTech VCI Pod near the shift lever, laptop on my laps, ready for some DRB III exploration!
* On a side note: what differs from the original WITECH VCI POD
I have no experience with the original Pod. Here I’m making assumptions based on YouTube videos and info I got on the web:
https://www.obdii365.com/wholesale/original-chrysler-witech-diagnostic-system.html
(original wiTech VCI Pod for sale: $4599, 10 times as expensive as the clone)
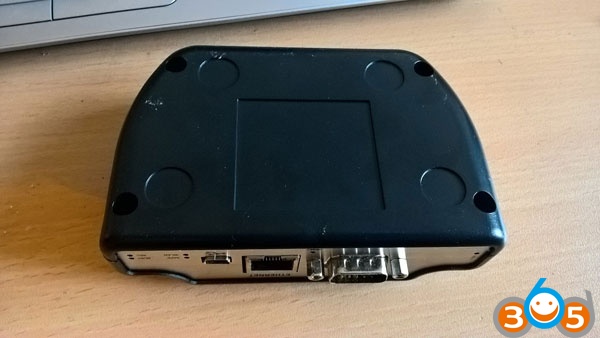
Let’s look at the back of the Pod… There’re the USB and Ethernet connectors, as well as a few LEDs. But these are missing:
- Left of the DB-15 VEHICLE connector, there should be a RJ-11 connector labelled “TRIGGER”.
- Above the USB connector, there should be a WiFi antenna connector.
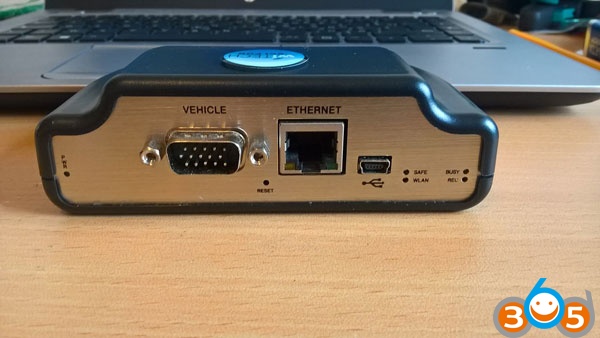
No sticker there…
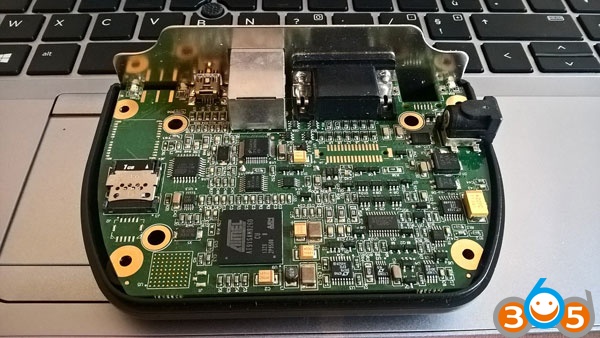
Let’s crack it open! Ok it’s not that bad… The board itself looks fine, and it looks similar to an original one. Chips are mostly ATMEL, solder joints look good. However:
- Bottom left corner, see the square SMD Ball Grid Array labeled U5? There should be the WiFi chip. On it’s right, labelled J1, is the trace for the antenna connector.
- Bellow the 1G SD card, there’s J2 connector. J4 (located bellow the DB-15 connector) is missing as well. SMD board connectors are soldered on the original Pod, but they aren’t connected. I guess they are used during manufacturing to flash some firmware, or for debugging.
- Right above the SD card, there’s something labelled J6 I think… I don’t know for sure what goes there… There are also 3 vertical traces above these traces, near the metal plate. I think this should be Bluetooth chip and antenna.
- Upper right corner, close to the DB-15 connector, this is where the RJ-11 connector should be.
- Solder joints on the USB plug look weak, and I understand why these devices (including original ones) break so many plugs there! But thanks to the capacitors close to the plug, it’s an easy fix.
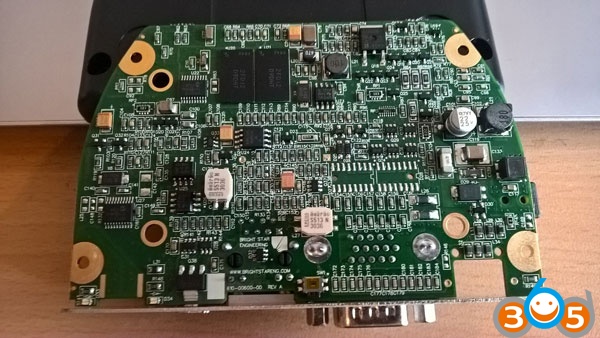
Now on the other side of the board, a few components are missing but who knows why. It’s not uncommon to design a board with components that aren’t implemented in production boards. One thing to note tho, the logo and the URL to Bright Star Engineering. I don’t know if they used to build the wiTech boards…
I am using DRB3 emulator vci pod clone. Because the wiTech software crack supports vehicles from 2004 to 2013 but my cars aren’t listed, use the DRB3 emulator. That’s why I bought this toy for.
DRB3 emulator vci pod clone… here you go
Initialization
First thing first, the network configuration when the Pod is plugged to the computer through USB. Nothing to do here, this is only for information.
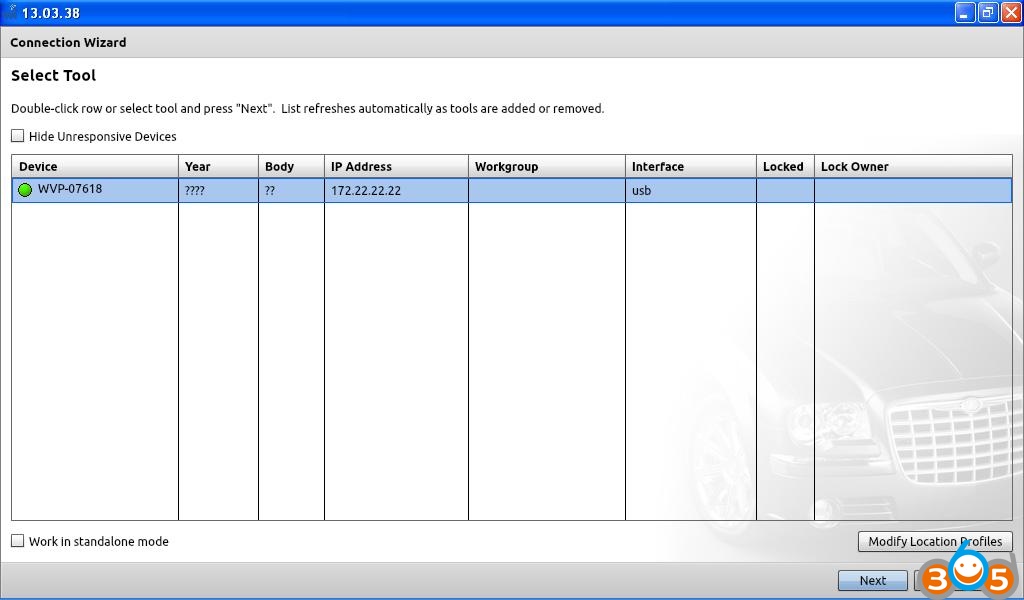
the wiTech software starts
(there should be a shortcut on your desktop after installation), and this is what greats you. If your car needs DRBIII, click on the lower right button labeled “Launch DRB III”. If you have a CAN car, click on “Next”. As I only have a 2000 300M I’m gonna cover the DRB emulator only.
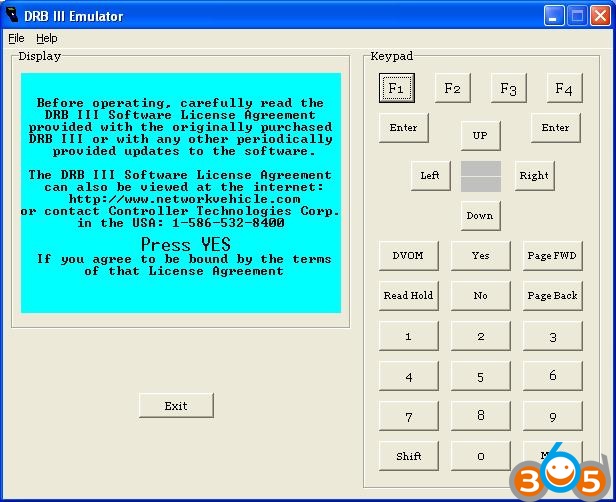
And here it goes! The emulator fires up. Even tho there’s a visual keyboard on the right side of the application, you may find easier to use your laptop keyboard for navigation. The most useful keys are:
- Yes/No : Y or N on your keayboard
- OK/Enter : ENTER
- Navigation (left, right, up, down) : navigation keys on your keaboard
- Break Page (used for Cancel or BACK in the emulator : CTRL+P on your keyboard
- F1-F4 keys correspond to the icons shown on the bottom of the emulator’s screen, when applicable
Click on YES to continue, obviously…
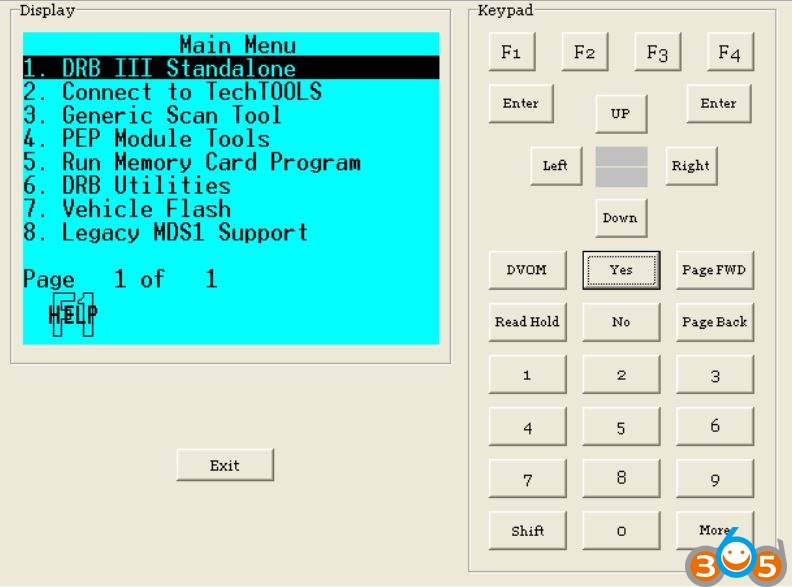
now on the main DRB screen.
Select the DRB III Standalone and Enter.
select the first option (1998-2004 vehicles) and ENTER, then ALL if with a LH car.
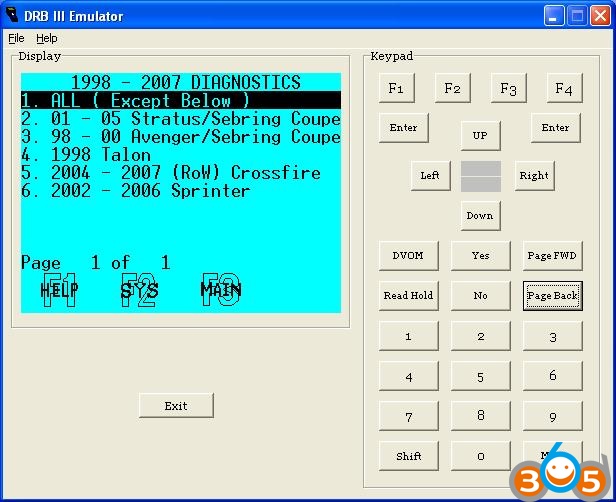
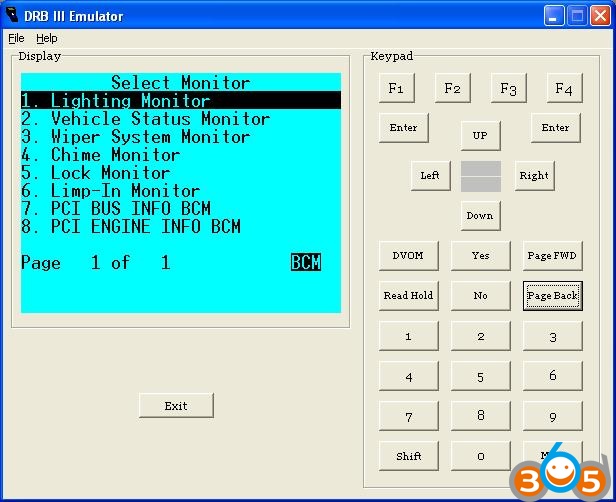
And here are now the options
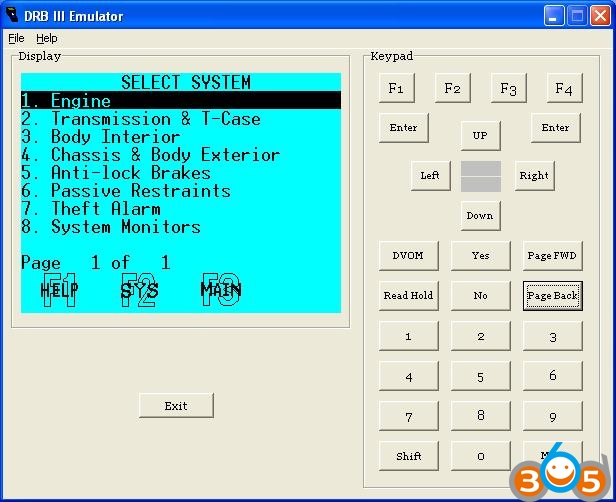
SUB MENUS CONSTRUCTION
Most sub menus are alike and are built around the same options:
- System tests : might contains sub menus depending on the selected module, you can perform self test routines here
- Read DTCs : error codes for the selected module
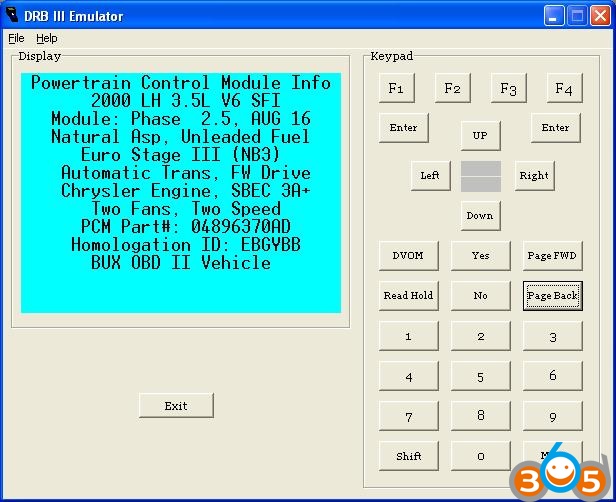
- Module Display : prints information about the module like part number or calibration ID
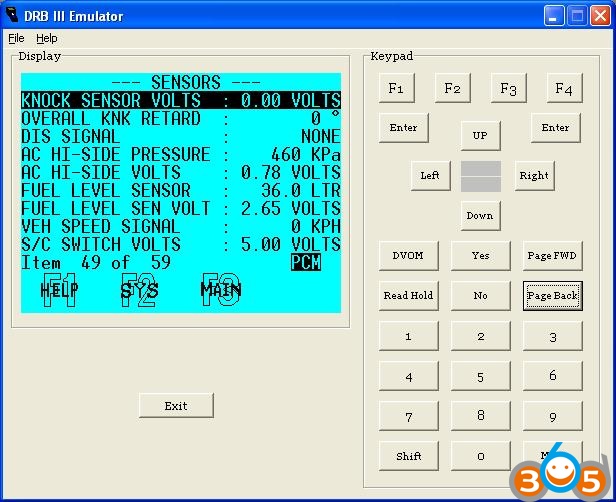
- Sensor Display : all you need to know about sensors, like manifold pressure, TCM CVI, injector timing, voltages… The list would be endless
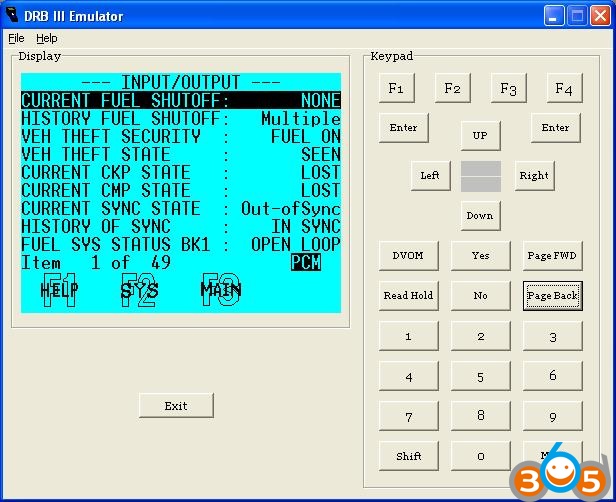
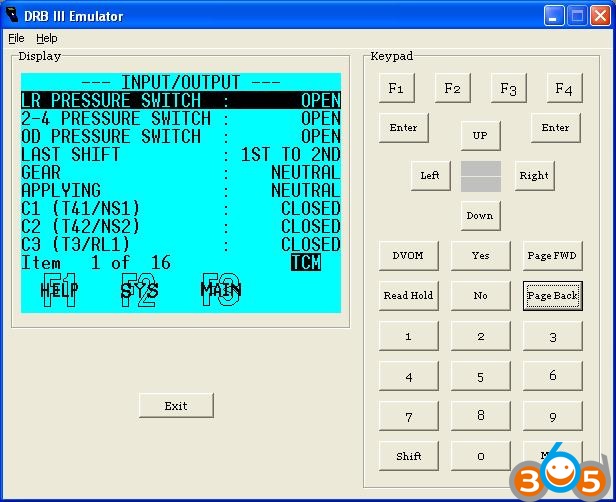
- Input/Output Display : shows status of actuators, switches and relay, basically everything that should be ON or OFF
- Monitor Display : this menu will have a bunch of pre-set lists of sensor or IO values, each “list” correspond to common sensors to monitor for a given issue like no-start, etc…
- Custom Display : you can define custom lists of sensors or IOs
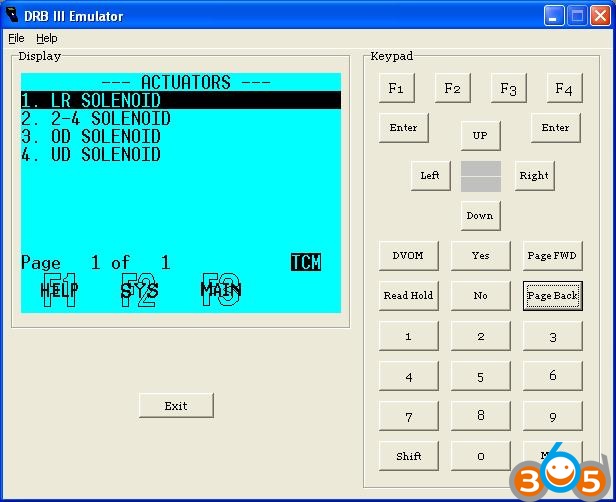
- Actuator Tests : check if your fans are running when told to do so, turn your injectors ON, test your headlights and related relays, etc…
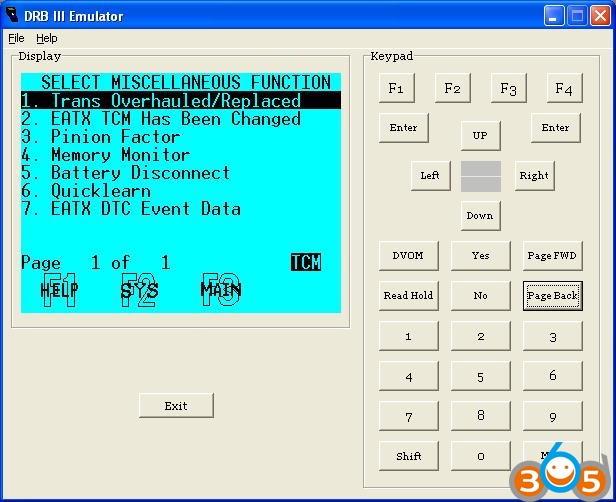
- Miscellaneous : well… I’d say that this menu contains configuration routines or values (TCM replaced, SKIM replaced, RKE horn chirp status, etc…)
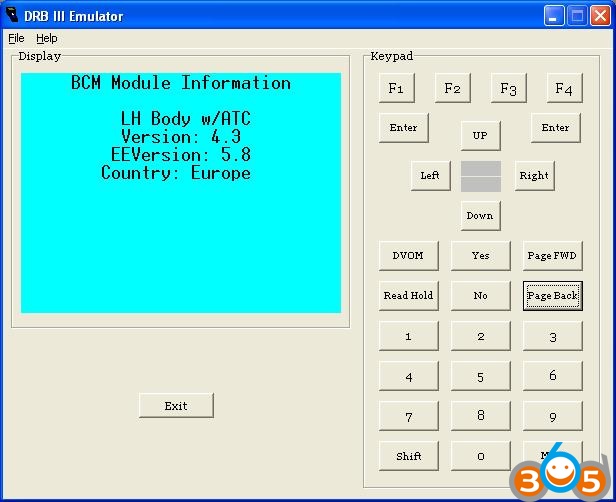
CODY CONTROL MODULE
Select the BODY INTERIOR line and ENTER. There is a missing screenshot here, as this BODY INTERIOR menu contains something like BCM, Memory Seats, Doors Gate and Confort, Cluster, Audio, HVAC, AC… Select the BCM sub-menu and press ENTER. The DRB will briefly tell you what kind of BCM you have, and you are then redirected to a sub menu dedicated to the BCM. Press ENTER or CTRL+P to skip the ID screen.
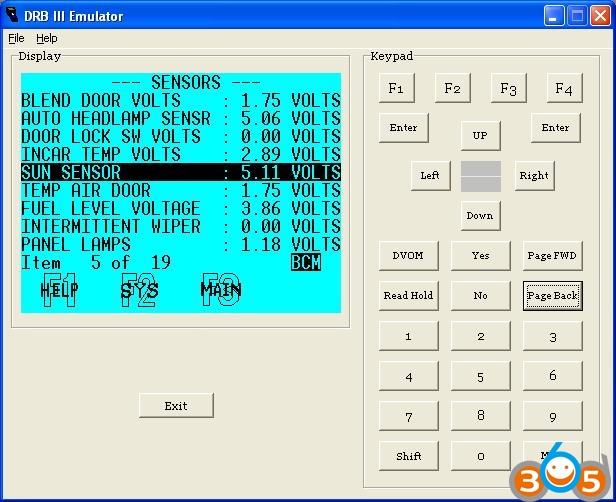
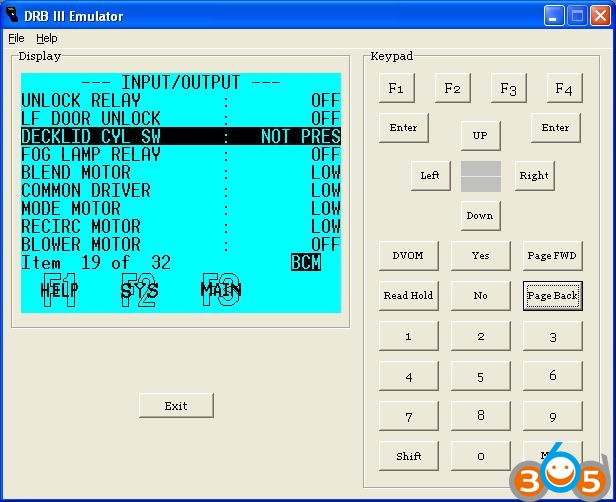
Some BCM sensors and IOs:
List of available Monitor Views available:
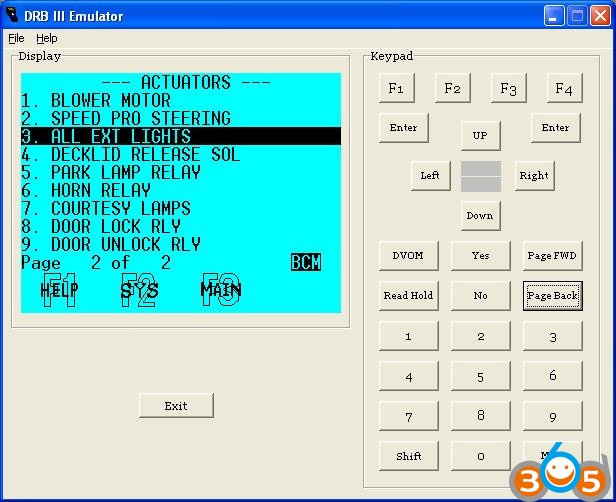
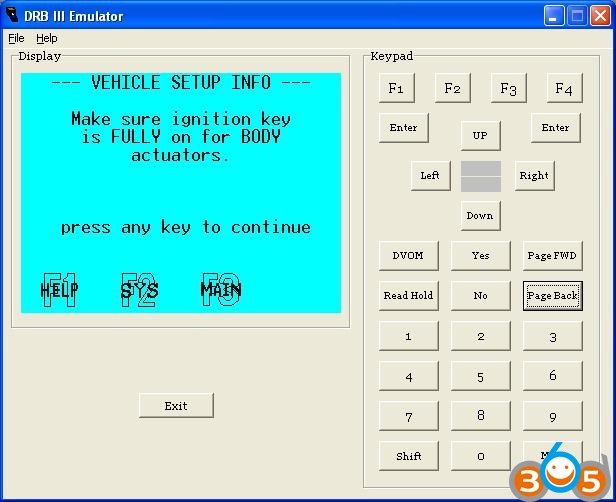
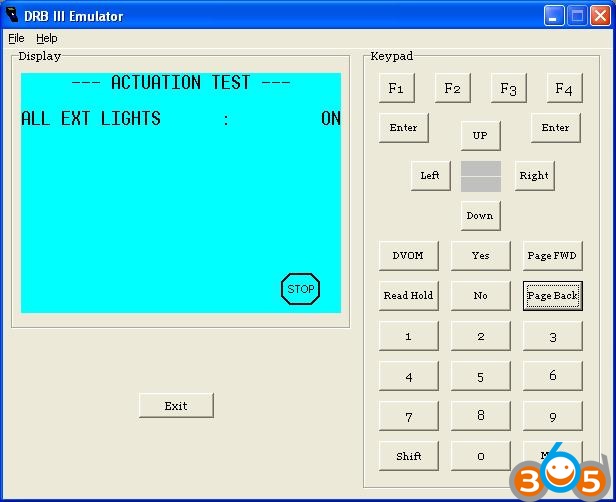
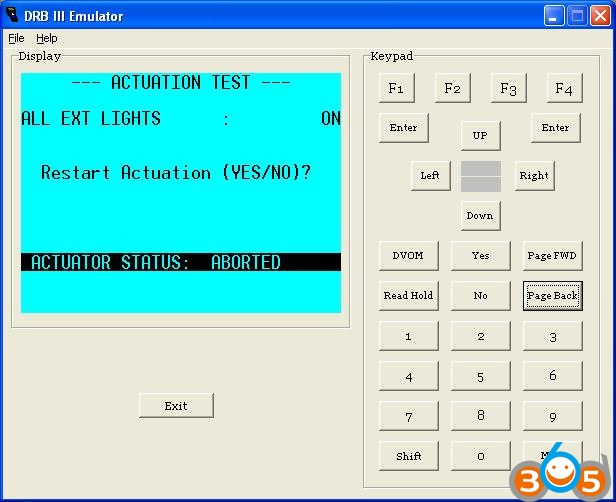
Actuator tests menu on the first screenshot. I chose to run the “ALL EXTERIOR LIGHTS” actuators test. A warning is displayed and after confirmation external lights started to blink. It’s not obvious but in the third screenshot you can see the “STOP” icon on the lower right corner, you can “simulate a clic” on this button by pressing the F4 button or key on your keyboard. You’re asked to confirm by pressing YES or NO. You can now exit the test by pressing CTRL+P (or Break Page button). If you exit the test while it’s running without stopping the actuation, the test WILL CONTINUE!
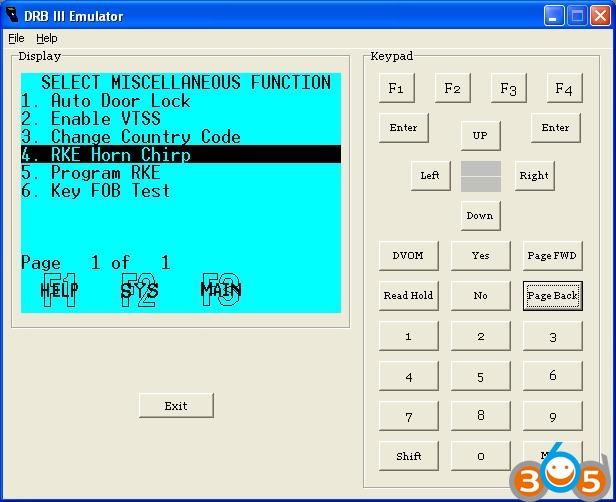
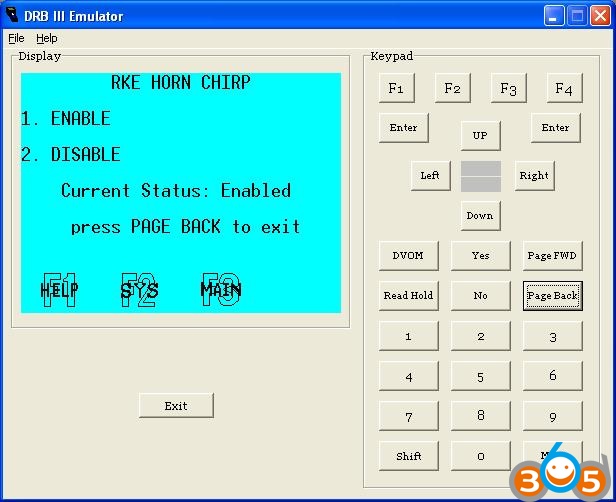
And finally the miscellaneous menu for the BCM, and an example with the RKE Horn Chirp sub-option.
BODY – CLUSTER
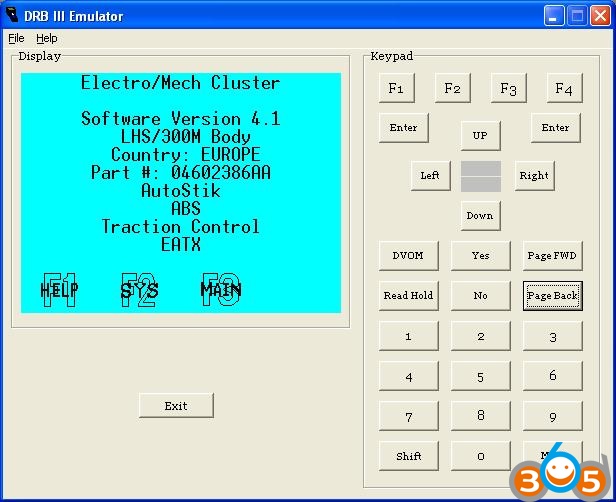
Options for the cluster are limited. Basically check its part number, check if the cluster can communicate with the PCM… IIRC you can also validate the mileage (but not change it, hopefully). There’s also an option in the Misc. section to initialize a new cluster… I’ve done it on mine but I don’t know yet what it did This screenshot shows the ID of the cluster installed in my car and I think there is a false information (or a misuse) as I have a US 150mph cluster…
BODY – MEMORY SEATS
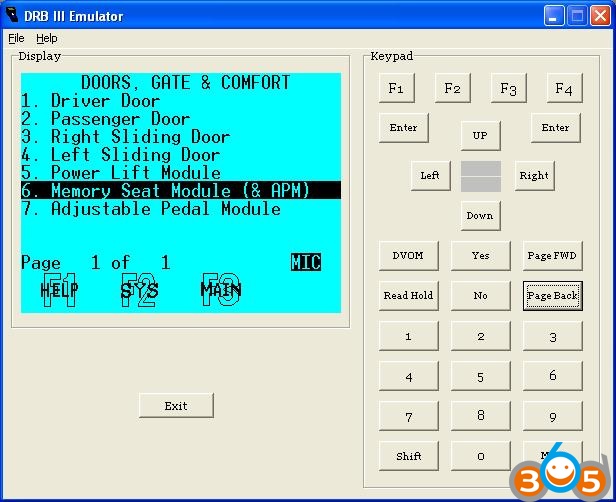
In the BODY menu, select the DOORS GATES AND CONFORT sub-menu. There is a bunch of other options here but our cars aren’t equipped with Door Modules or APM. I guess the Power Lift Module is the power sunroof?
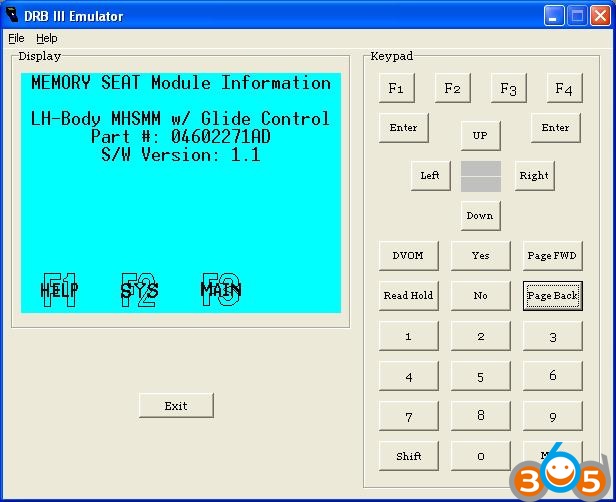
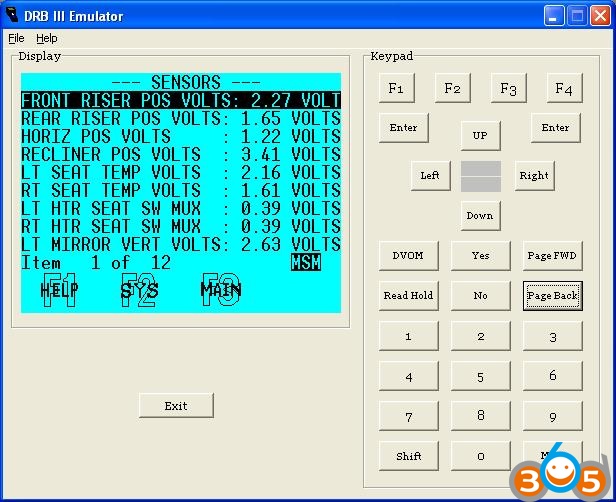
Select the MEMORY SEATS MODULE. Here is the ID of the module installed in my car, and a view of some sensors. In the MISCELLANEOUS menu I noticed the GLIDE CONTROL feature was OFF. I tried to enable this feature but I don’t know yet how it turned out.
ABS
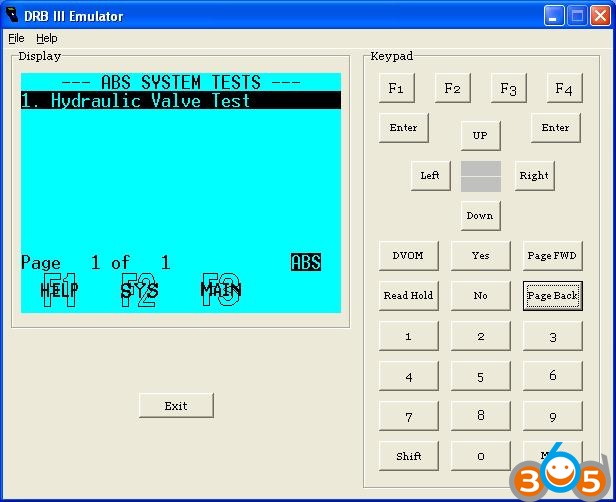
Long story short, I only have a screenshot with the single system test available for ABS. The MISC. section however will be usefull for brake jobs, as you can run the ABS bleeding routine from there
ENGINE
Available system tests:

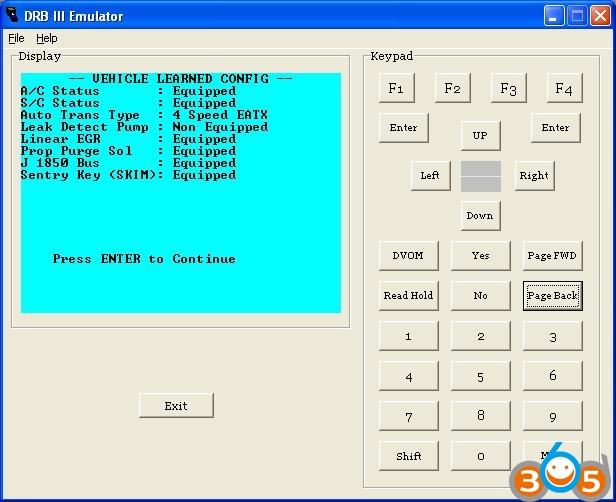
Module Display option, a second screen gives you more details…
Some sensors and IOs:
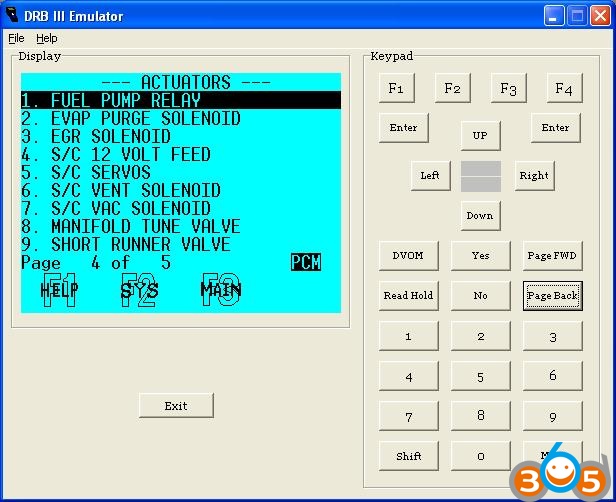
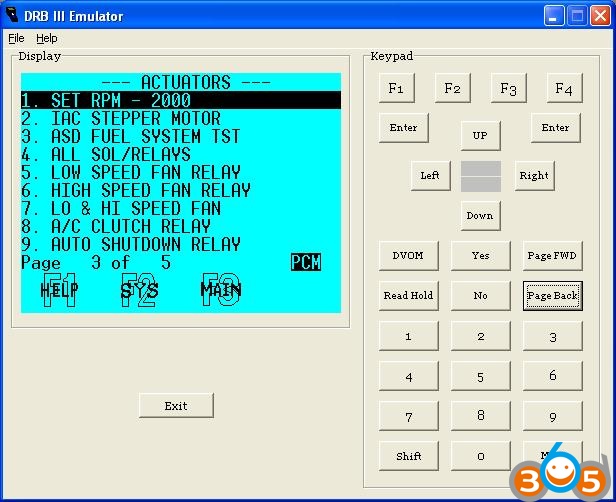
3 pages out of 5 of engine related actuator tests:
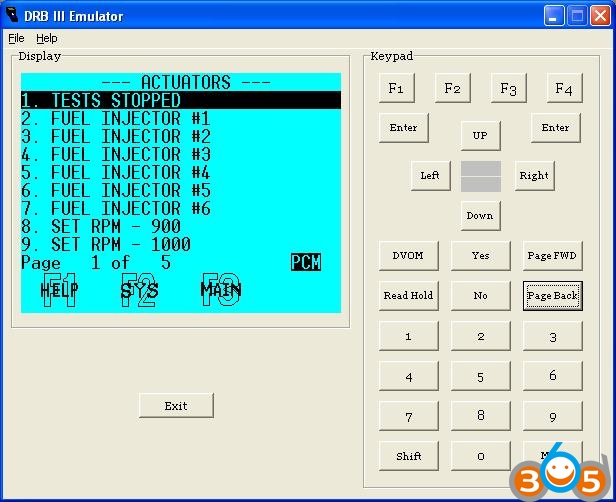
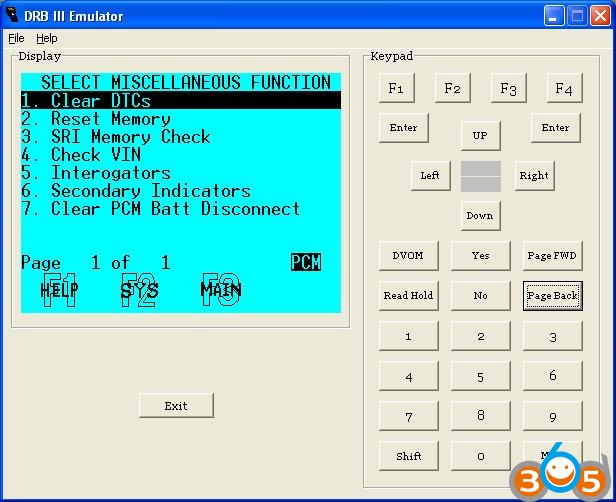
The MISCELLANEOUS sections:
TRANSMISSION
Select the TRANSMISSION section in the main menu. A sub-menu shows up but obviously the only section we, LH drivers, could be interested in is the first one, as we don’t have the last 3 modules.
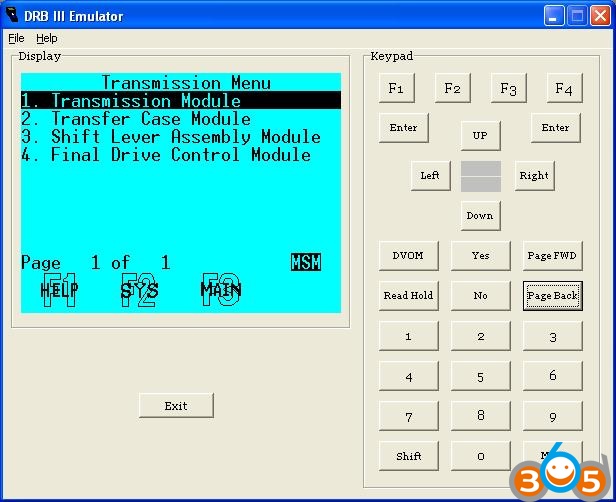
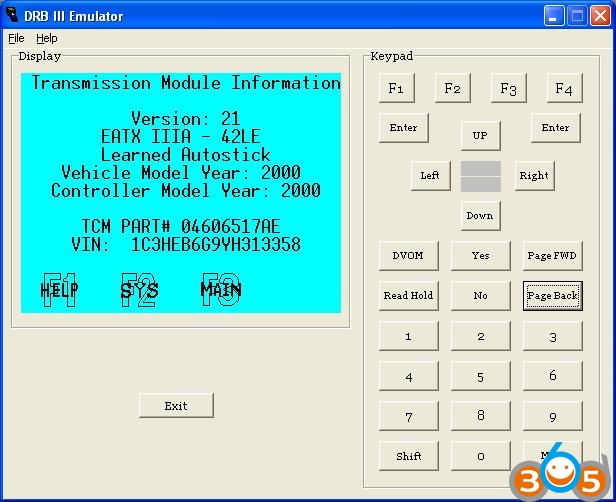
After selecting the TRANSMISSION MODULE section, an ID screen tells you what kind of TCM you have. Press ENTER or CTRL+P to skip this menu. Side note: from what I can see there’s an update available for this TCM based on the PDF available here(04606517AE was replaced by 04606517AF).
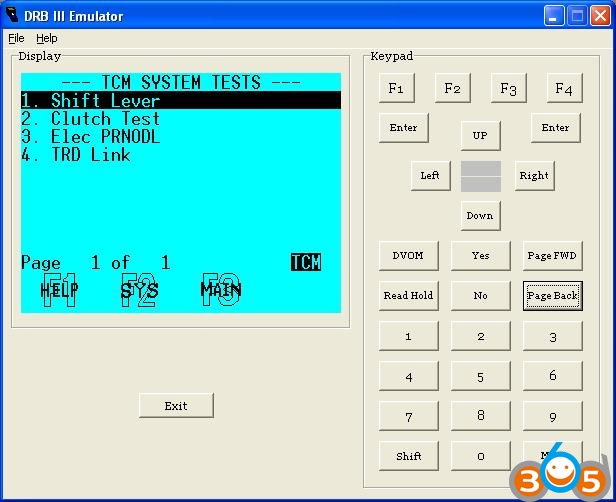
System tests available for the TCM:
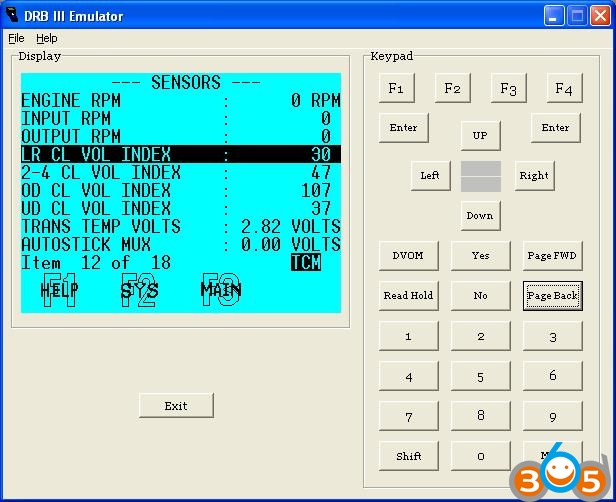
Sensors and IOs values (note the Clutch Volume Index):
Actuators tests:
And the miscellaneous section
For now this clone is working great All these screenshots were taken with the Pod connected over USB without the power cord, ignition key in the ON position of course, engine OFF. For safety I’m gonna buy a new battery for the laptop as it doesn’t hold the charge anymore, and I don’t want the power to go down while connected to the car.
After these tests I switched to the ethernet connection and I ran an actuator test on injector #1. I was expecting the injector to click a few times (that’s what FIAT and Alfa Romeo do) but the fuel pump fired up as well, filling the cylinder with fuel…
Next step : upgrading the TCM. It will require a subscription at TechAuthority.com for a day or three tho.
$419 for wiTECH VCI Pod. A 1-day subscription at TechAuthority is $25, a 3-days subscription is $35. Around $500 in total. This is the biggest expense I have ever made for this car… Was it a wise one? I don’t know yet and I don’t wanna know